Working with Visma Connect OAuth 2.0
Alright lets get rocking - if you are unfamiliar, I will quickly try to summarize how OAuth 2.0 works through Visma Connect. After that we'll jump into Postman with our collection and try it out ourselves.
You can follow along or just read through it, to get some insight in the process. 👀
Do note that steps 1-3 only happen ONCE if you have offline_access turned on. With that you will get refresh tokens, so your users won't have to authorize you every single hour.
First
We need to generate a link for our users to click. This link needs to contain:
- client_id - the isv_companyname.
- scopes - the ones you applied for, for instance dineropublicapi:read, dineropublicapi:write and/or offline_access.
- redirect_uri - which needs to match the one we have in our Visma Connect settings.
- A response_type of code.
- We might also include a nonce or state value, so we can identify the user, once they return and prevent replay attacks.
It could look something like this:
https://connect.visma.com/connect/authorize?client_id=isv_{INSERT_YOUR_CLIENT_ID}&response_mode=form_post&response_type=code&scope=dineropublicapi:read+dineropublicapi:write+offline_access&redirect_uri={INSERT_YOUR_REDIRECT_URI}&ui_locales=da-DK
Do note that this is a link we create for our user to interact with. So it is neither a POST nor GET request. We do recommend avoiding openid connect, unless you are very comfortable with it. This should also be reflected in your Visma Connect Application settings.
Second
We wait for the users to hit either accept or cancel in the window they get. All we do here is wait for the user. Further down this tutorial you can see this in practice.
Third
If the user accepts, we'll get a POST request send to our application through our redirect_uri. This POST request will contain everything we need to get an access_token. Simple enough.
We will get a code, id_token, a confirmation of scopes and so on to validate the request. The most important part, that we will continue to interact with, is the code.
Forth
We exchange the code for a token, that we can use to interact with the API. This happens through a regular old POST request to https://connect.visma.com/connect/token. Here we send:
- grant_type of authorization_code
- our redirect_uri from our visma connect application settings
- the code we got in step 3
- client_id
- client_secret
We send this as content-type: application/x-www-form-urlencoded. Make sure to send it as a url-encoded string. If the body is formatted as a json, the request will fail.
In return we'll get our access_token, id_token, expires_in, token_type and scopes.
We're ready to interact with Dineros API.
Just to reiterate, if we have offline_access turned on here, we'll also get a refresh_token that we can exchange for a new token, so the user doesn't have to go through this once an hour, and we can continue to interact with the API without user involvement.
Once you need to apply this to your own code, you can find all the information in the Visma Connect Documentation. Just make sure to use the right scopes, and remember you're creating a link for user interaction in step 1.
Getting our Postman collection
Now that we are all setup with Visma Connect, we can start making our first requests. If you haven't setup Visma Connect yet, you need to go back to Getting started.
First of, lets get our Postman collection downloaded.
Now we can create a workspace on Postman and add our new collection. Easy pease.
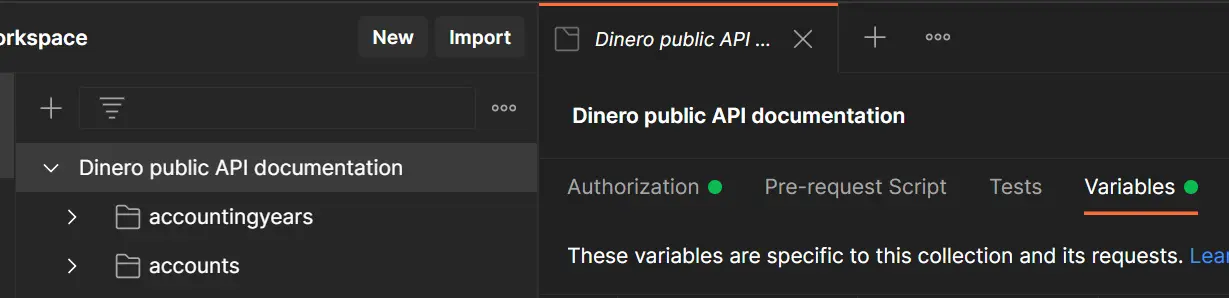
Filling out variables
Click the Collection in the left, and find the variables part of the Collection. Here you need to fill out the following:
- Your Client ID from Visma Connect
- Your Client Secret from Visma Connect
- Your Company ID from Dinero
- Make sure the scopes are the same as the ones you requested (read/write/offline)
Once everything is filled out, make sure to save. (Yes - I forget this myself, the first time I tried to test our API with Postman)
Get New Access Token
Lets switch to the Authorization tab in the top, scroll to the bottom, and click Get New Access Token.
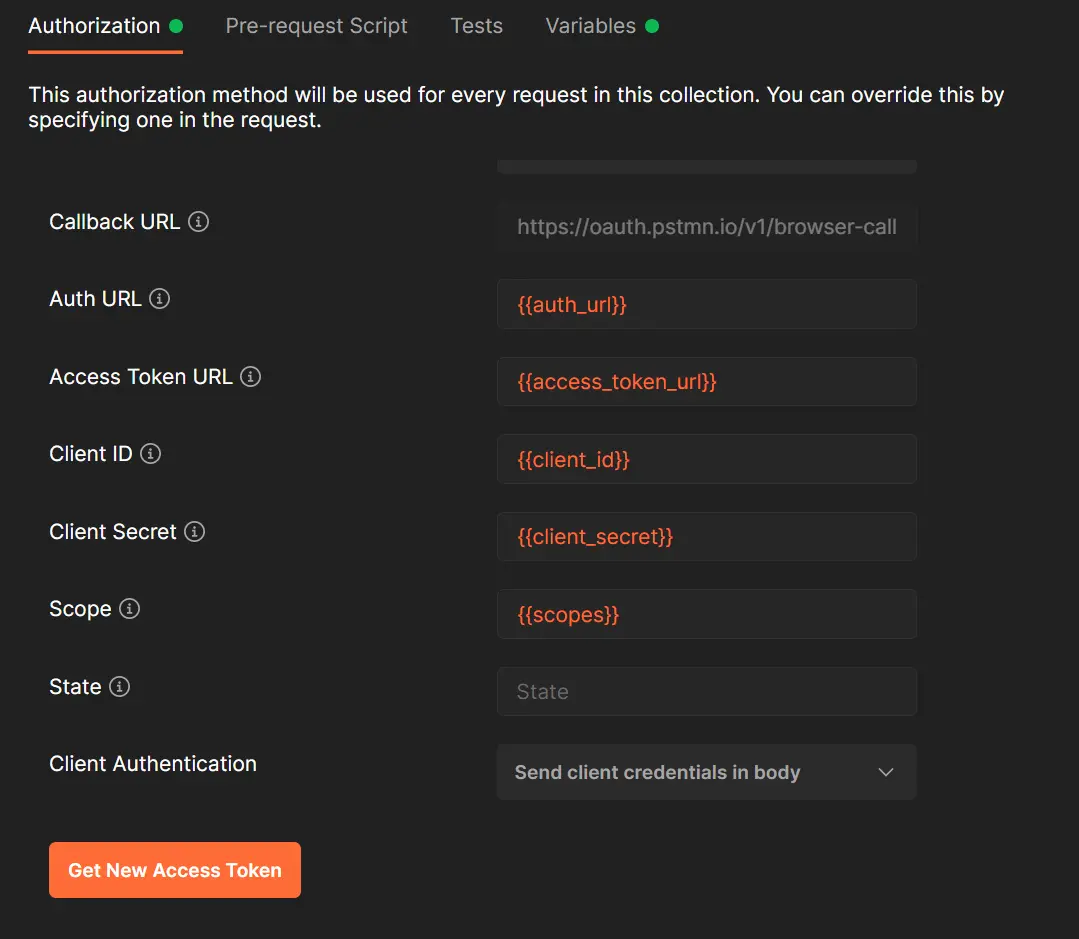
All the credentials will be fetched from our Variables. Cool!
This is what your users will experience
Now once we've clicked to get the new access token, we'll be sent to either a login page or direct to the authorization page if we already have an active session.
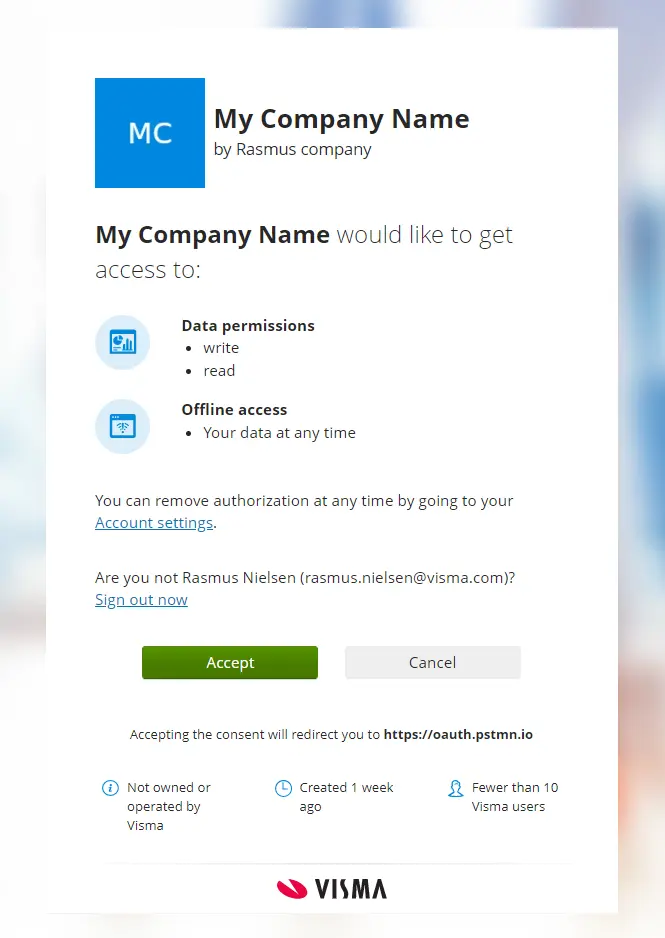
This is what your own users will see, once they click your link to integrate. Now all you need to do is hit accept.
Once we get back to Postman, lets hit Proceed and Use Token.
If you get an error at this point, we can rewind back to when we created our application in Visma Connect. Remember we showed you a Debugger here? This is the case where we can use the Debugger. We found it under More > Debugger, under the My Applications part of Visma Connect.
Behind the scenes
What happens behind the scenes is, first we'll get authorization code back, and then Postman will exchanges that for a Token using your Client ID and Secret. Obviously you'll need to implement all this, and you can read all about that in the Visma Connect Documentation.
If you've used our recommended setup, you'll also get a refresh token back, that can be exchanged for a new token and refresh token. Each refresh token, with our setup, can only be used once, but we'll get a new one every time. So it's important to keep track of these to avoid any repeat request errors.
Let's make our first request!
Nice! With our freshly created token, we're ready to make any and all requests. First of all, lets try an example call, which is a great first start.
In our test case here, we already know our Organization ID, but what if we didn't? The user has just authorized us, but what if they have three different companies on their login? Which one should we be looking to?
Let the user choose what company we'll use
A great implementation, in your actual integration, would be a menu where the user can pick between their companies, to choose which company to setup integration to. So lets request a list of the users companies, so we can let them choose which one to integrate.
Lets head to our list of endpoints, and find List Organizations.
This is a GET request, which means we can get a list of organizations belonging to our user.
Lets try it!
In our Postman collection, we can find it under the category of Mixed.
Making the request to GET a list of organizations
Now we have a few query parameters we can use here. But lets try it without any first of all.
All we need to do now, is actually click Send and lets see the magic happen.
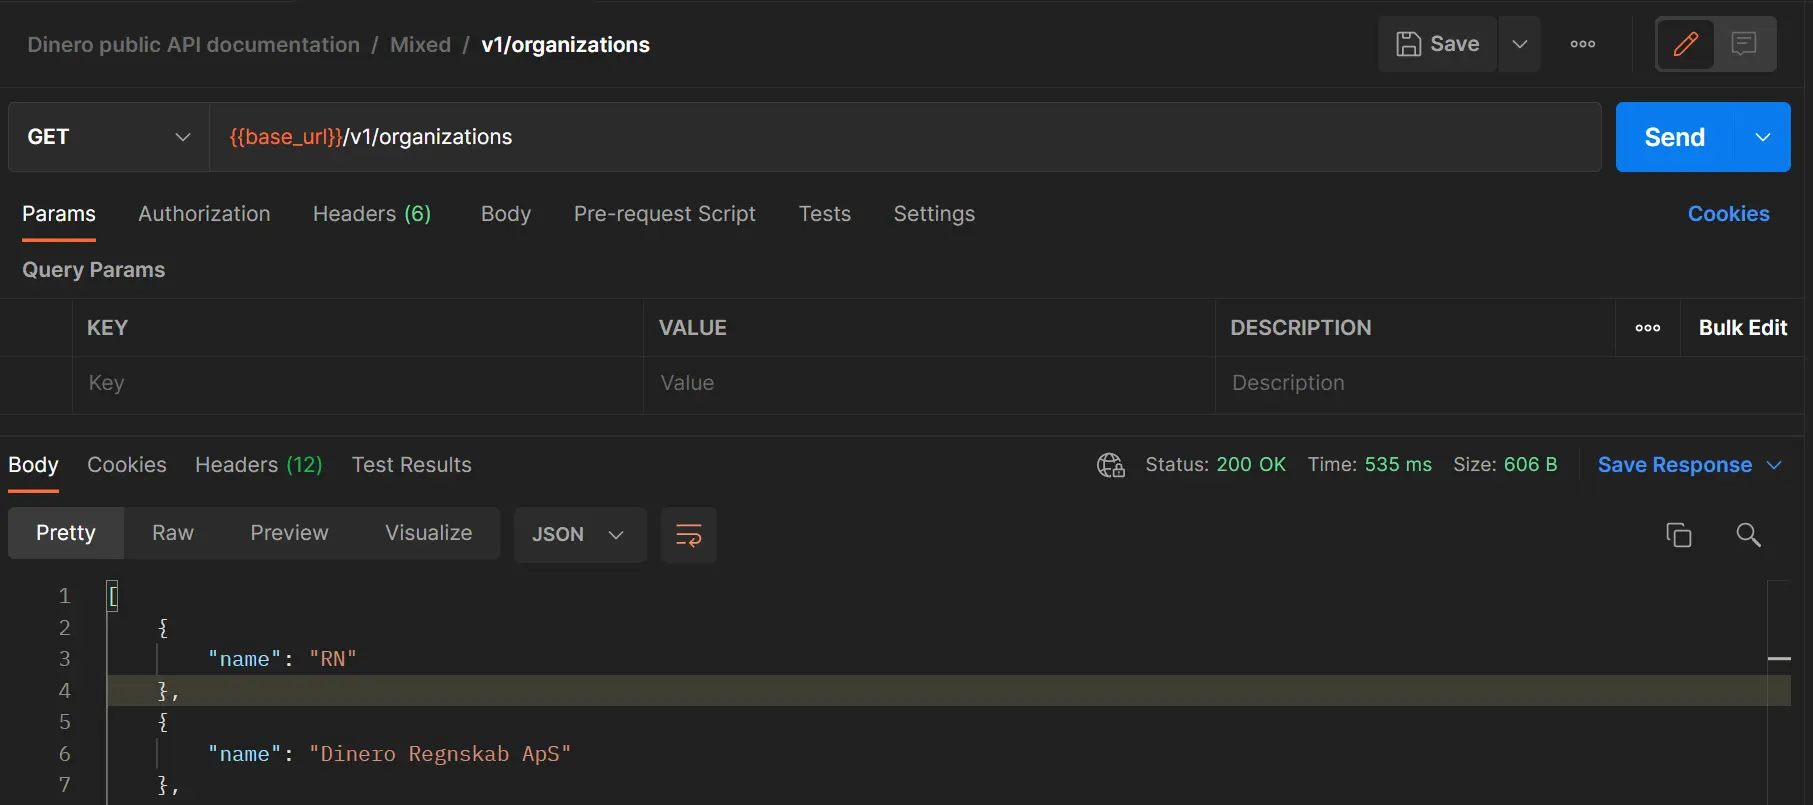
In my case here, I have a company called RN and a company called Dinero Regnskab ApS. (Plus some more test companies further down)
Great - but not super useful, because we need their Organization ID to actually make requests to a specific company.
Lets try with some query fields. Lets find out their Organization ID and if they are Pro or not, which is needed for integrations to work. Already we're able to do some great validation for our users.

We get this back as a neatly organized json.
In our actual application we can now present this list to the user, and let them pick which company to integrate. How awesome is that? 🎉
The world is your oyster
With this I think you're ready to do whatever you want. You can GET invoices, POST Purchase vouchers and so much more.
And remember our list of endpoints, which you can find here.