Terms of use
Before starting, please read our terms of use.
Personal integrations
Are you creating a personal integration for yourself only? Then you should use our personal integration system, which is much simpler for this case. These are two different and seperate authorization systems, so you only need one or the other.
The following system is only for public integrations.
The three main steps
You must complete these steps, in order to get a public integration with Dinero.
- Go through our Getting started section. (You are here)
- Thoroughly test your application.
- Go through the review and publish section.
Visma Connect
IMPORTANT❗ Visma Connect OAuth2.0 is a user based authorization, not organization based. So for instance, if you have a user with 10 organizations on your end, and 10 organizations in Dinero you should handle this through one authorization. This is especially imporant for accountants who might own several organizations across the two systems.
Once you're all setup, we recommend taking some time to go over the Visma Connect Documentation. But there are some things that you need to be aware of and that are different from the standard documentation for Visma Connect. Whenever the two are in disagreement follow our documentation here.
Check it out!
Want to see exactly how all of this will work in your own application? In less than a minute, we will go over all the essentials of how it'll look and function in practice, in our demo video below.
Creating an account
First of all, you need to create an account for the Visma Developer portal.
You can sign up here.
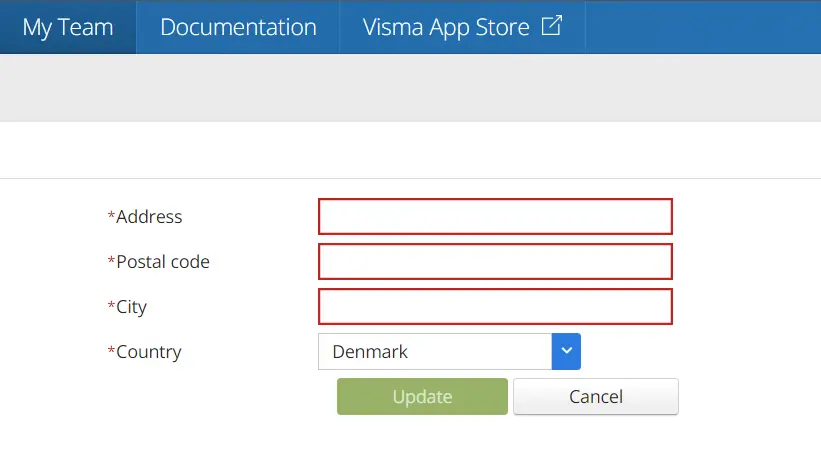
Make sure during the setup, to set your teams country to Denmark, otherwise you might not be able to apply for Dinero scopes later on.
Also, make sure you fill out your real organization details. Moving forward, if you want, you can create several different applications, if you want one for test and one for production. But the team needs to be a real organization with a real CVR number. If you create a team called "Test" or fill out organization number with anything but your actual CVR number, your future applications will be rejected.
Once you've signed up, you should see something that looks like this:
Add Application
Now we're ready to get started - go to My Applications in the top menubar and in the top right, you can click Add Application.
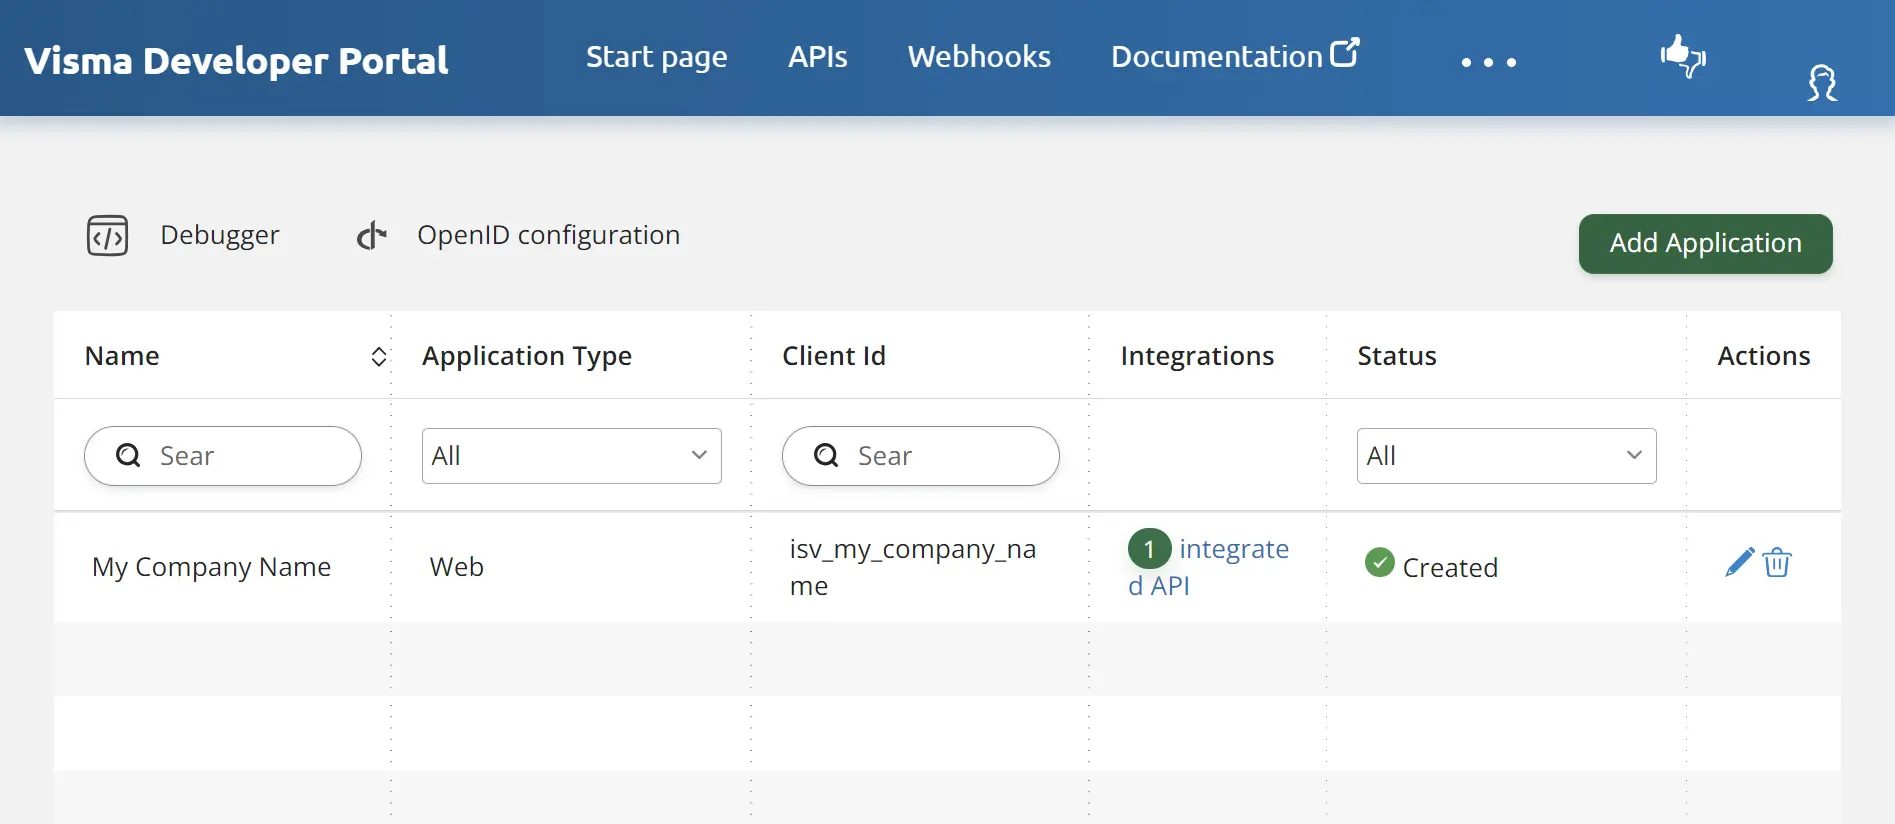
IMPORTANT ❗ The Debugger, seen on the top left here, can help so much, when the first attempt to authorize inevitably fails. If it does, you'll get an error code, that you can paste into the Debugger, and get feedback on why the attempt failed. It might take a few seconds, so have a little patience. 👍
If you ever need to change anything in your application, this is also where you'll need to go.
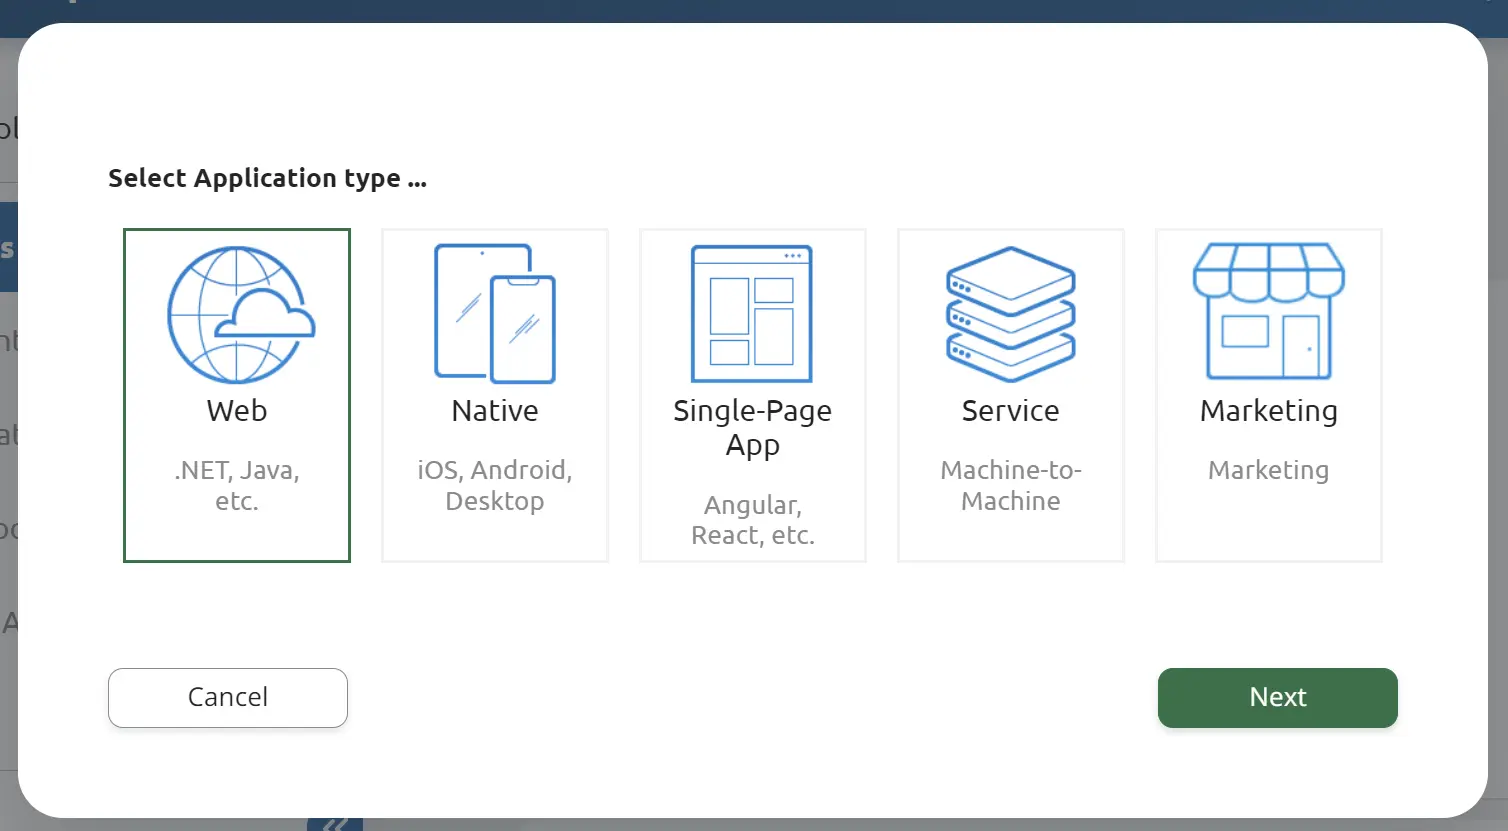
Creating our Application
First of, and this very important, you must choose web application, as it is currently our only supported type.
Setting up our Application
Alright, in this next step we'll have a lot of things going on, lets break it into smaller pieces.

First off, we need to give our application a Name and an Id.
The Name is what users will see when they want to authorize your product to be able to interact with Dinero.
The Client Id is the Id you use to authorize and what we see all over our internal logs.
Both Name and Client Id should clearly indentify your organization and/or your product.
IMPORTANT❗ We'll only approve applications whose Client Id can uniquely identify the company behind the integration. For instance "isv_test-application" would certainly be rejected, while "isv_Vibrant" would be approved. If you wish you could also add a product name to the Client Id and/or Name, for instance "isv_Vibrant_payments". We enforce this, so we can easily identify the company behind any request to our API. You should not add Dinero to any of these names, since you do not represent us.
Grant and offline access
Now next up, we'll need to setup our grants and offline configuration if we want that (which we probably do).
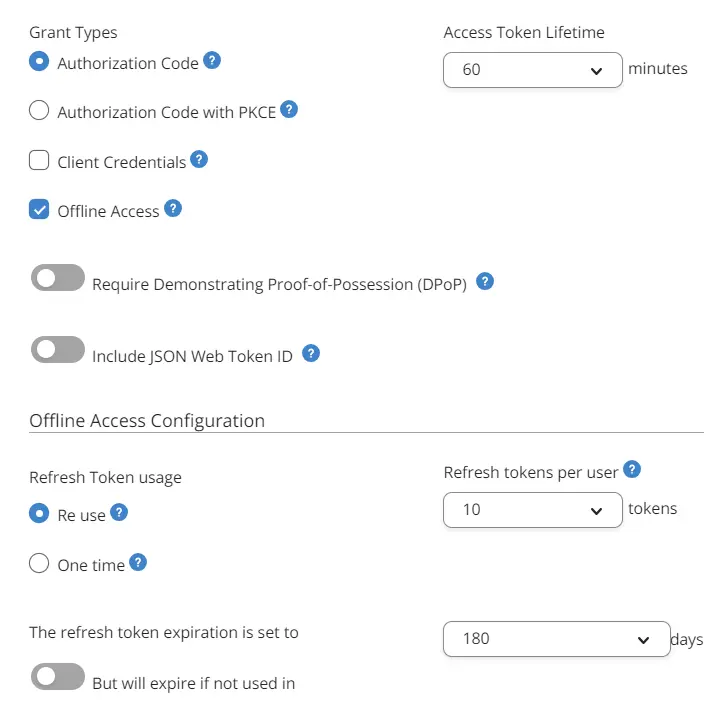
IMPORTANT❗ There is a "Authorization_code with PKCE" grant type you can choose. If you do so, you need to add a code challenge to your initial request. If you are unsure how to do this, please pick the regular "Authorization Code" grant, as shown above.
Here we have a few things going on, and some things to explain. Offline access just means, that our user doesn't need to go through the approval steps, every time we'll make a request. This will in most instances be a nice feature, for most integrations, so we'll grab offline access. 👍
Next we'll need to set this up, and we'll recommend the following settings, as shown in the screenshot above.
- Get a re-use refresh token
- Give it a 365 days expiration
Re-use tokens are much easier to handle than one-time tokens since you can exchange the same token several times. You also know exactly when they will expire.
You can use one-time tokens, which can get a theoretic unlimited expiration, but they can be difficult to handle properly, as they will be invalidated if they are handled incorrectly. For instance if you attempt to swap an already used refresh token, the entire authorization is invalidated. More can be found regarding offline access here.
Therefore we recommend the above setup for ease of use. The user will need to reauthorize you once a year though, so keep that in mind.
Setup redirect URI
Alright, we're almost done here!
First of, make sure to turn off OpenID Connect by default - unless you really want to work with it. Our Authorization guide and postman collection doesn't support it.

For the last obligatory part, we need to set a redirect URI. For our purpose, and if you wish to follow the next steps of our tutorial, we'll set this up for Postman.
Now if you use the browser version of Postman, like I'll do here, you need to use the URI:
👉 https://oauth.pstmn.io/v1/browser-callback
Or if you use the Desktop version of Postman, it'll be:
👉 https://oauth.pstmn.io/v1/callback
For testing purposes you can also use localhost, but make sure to remove it as redirect uri, once you head into production.
Finally!
Click save in the bottom and lets move on!
Credentials
Now this part might be self-explanatory, but we need some credentials. Obviously we already have our Client ID which will be isv_ourname. Again I'd like to remind you to pick a client name that can easily identify your company.
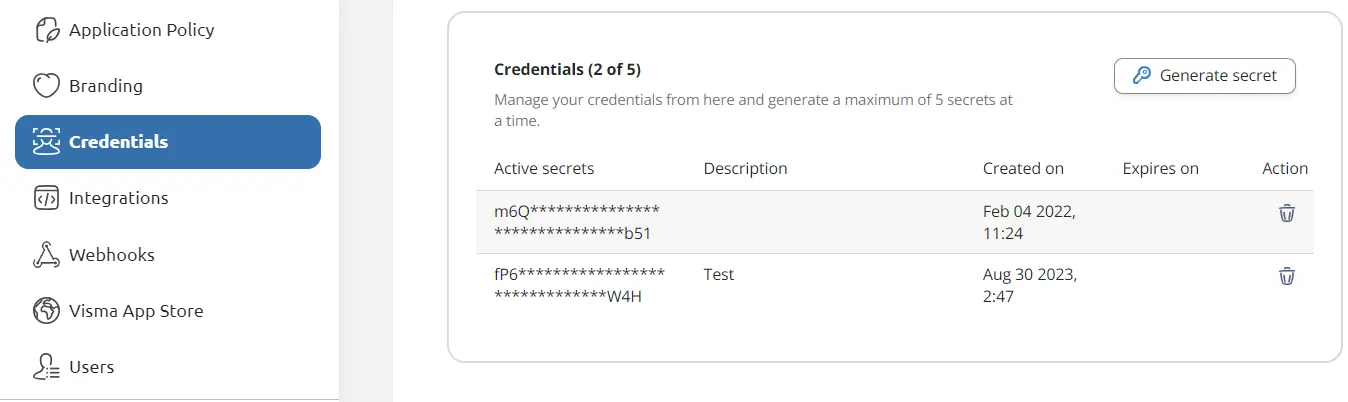
But on top of our Client ID, we need a Client Secret. So lets head to the Credentials tab, and generate a secret. Once done, you can copy your secret and save it somewhere safe.
What is great about Visma Connect, is we can go back here if we ever lose our secret and easily create a new one!
Scopes
YES! We've done it. Lets go to Integrations and click New Integration
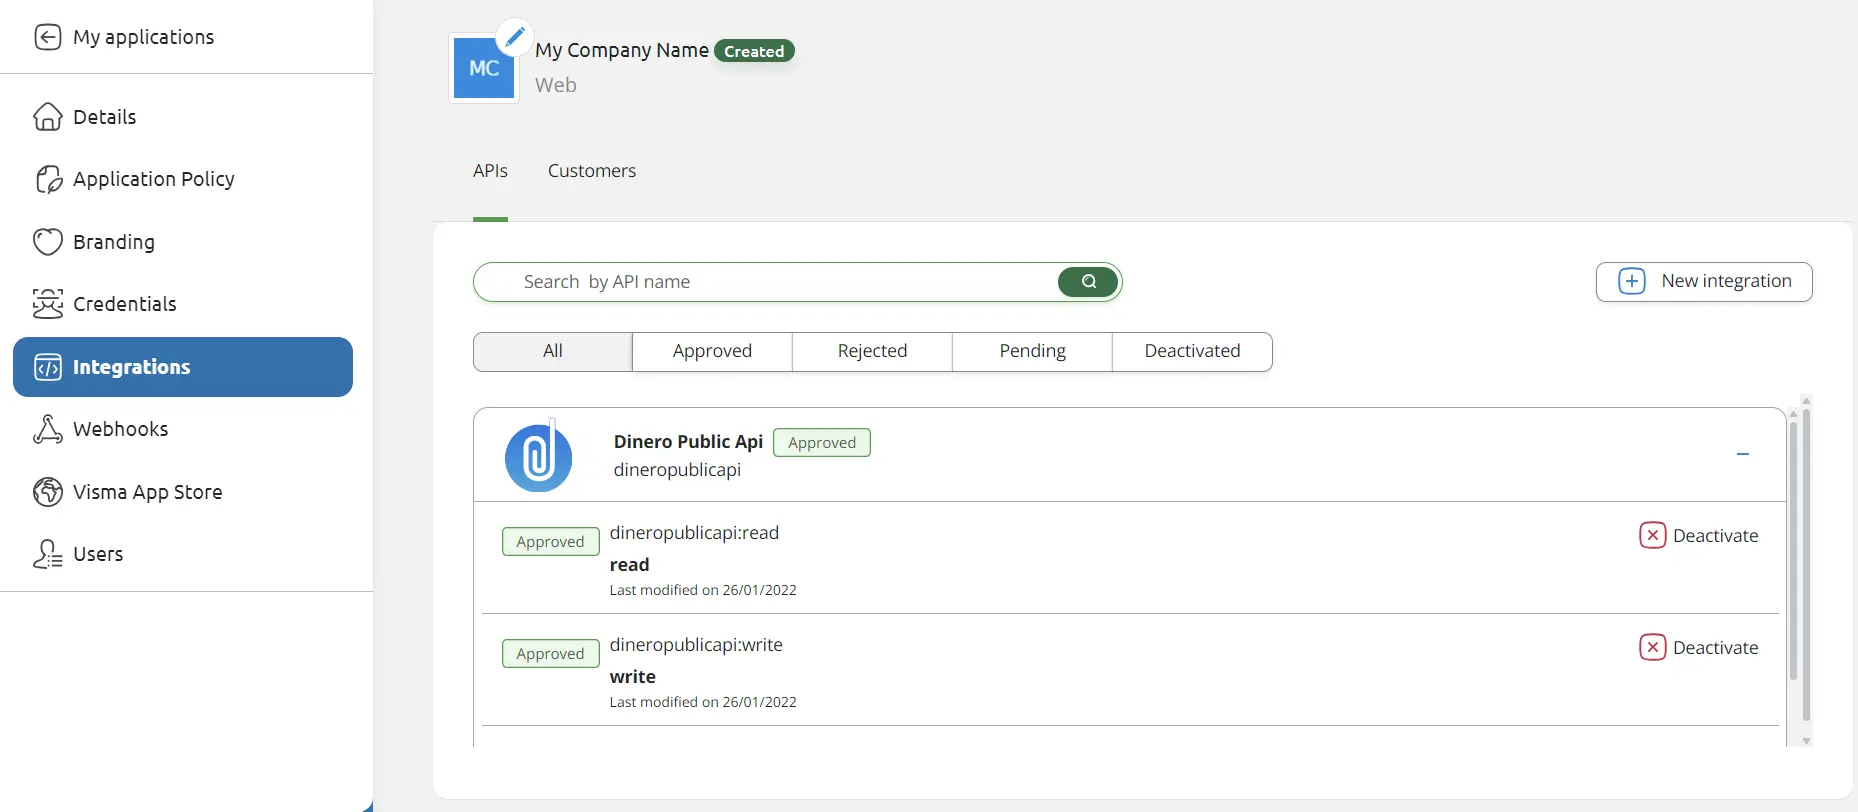
Choose to integrate to Dinero. Now the final thing is scopes.
If you do not see Dineros scopes at this point, go to My Team, and make sure your country is set to Denmark.
You can apply for Write and Read (NOT Internal). If you apply for our Internal API, it will be rejected. ❌
So apply for the following scopes:
✅ Scope: Read
✅ Scope: Write
❌ Scope: Internal
Obviously you don't need to apply for both read and write, if you only need one or the other for your integration.
And with that you're done.
Once you actually start asking for authorization, make sure to use the scopes:
dineropublicapi:read dineropublicapi:write offline_access
Next steps
Now we'll approve or reject your application. This will usually take up to a work day. To speed up the process you can go through the following:
- Choose a suitable application and client ID name that can easily identify your company
- Only apply for read and write scopes
And well - that's it. You'll get an email with either the approval or rejection.
The next step we highly recommend is looking at our Authorization guide.
IMPORTANT❗ You should read through our review and publish section and our FAQ for information on a lot of important aspect, for instance our rate limit and requirements of you, to be published on our site.
You can also take some time at this point to read through the Visma Connect Documentation. If you've been following along, then you've probably noticed that it's right there in the top, once we're logged into Visma Connect. 👍